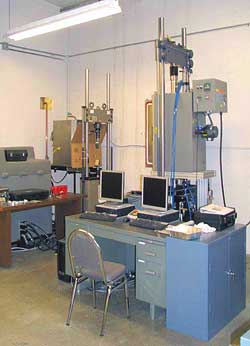
MTS 810 Teststar II Material Testing System and Environmental Chamber: Our 810 Material Testing System delivers a broad array of testing capabilities for both low and high force static and dynamic testing. With a broad range of force, the benefits of a environmental chamber, and computer integration this tester provides precise and reliable data with ease.
Features
- Force ranges from 25 kN (5.5 kip) to 100 kN (22 kip)
- The ability to test materials ranging in strength from plastics to aluminum, composites and steel
- A large test space to accommodate standard, medium and large size specimens, grips, fixtures and environmental subsystem
- The capability to perform a wide variety of test types from tensile to high cycle fatigue, fracture mechanics, and durability of components
Application
- Environmental Testing
- Fatigue Testing
- Fatigue Testing of Composite materials
- Monotonic Testing
- Fracture Testing - Fracture Toughness or Fatigue Crack Growth Test
- Component Testing
- Biomedical Testing
- Thermal Mechanical
- High Temperature Testing
- Axial Torsion Testing
Technical Specifications
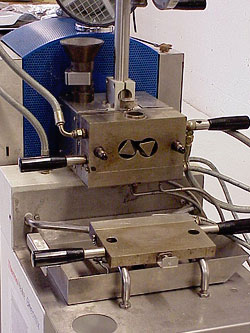
Our Thermo Haake Polylab Rheocord Drive with Polylab Rheomix High Shear Mixer Attached from Thermo Electron Corporation (http://www.haake.de/rheometer.htm) is an intelligent modular torque rheometer system for the simulation of industrial processes in the lab. The mixer tool enables the batch testing of many highly viscous substances. Mixer sensors are used to test processes such as the mixing, compounding and plastifying of polymers, chemicals, ceramics and pigments under production-style conditions. The Rheomix controls are sophisticated in data administration as well as the communication with the master unit via the data highway. Coded so that the master unit automatically senses which sensor is connected. The measuring sensor automatically informs the base unit and thus the operator of the configuration i.e. the number and position of the temperature control zones and measuring ports, unit-specific limit values as well as the possible sensor options.
Features
- Mobile measuring sensors avoid the necessity of handling of heavy and hot parts
- Integrated heating and cooling circuits reduce the number of plug connections and thus the danger of making incorrect connections
- Several peripheral units such as feeding and post-extrusion units are computer controllable thus meaning better reproducibility and documentation.
Application
- Mobile measuring sensors avoid the necessity of handling of heavy and hot parts
- Integrated heating and cooling circuits reduce the number of plug connections and thus the danger of making incorrect connections
- Several peripheral units such as feeding and post-extrusion units are computer controllable thus meaning better reproducibility and documentation.
Technical Specifications
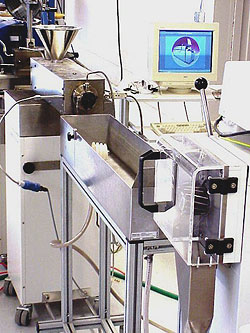
The Extrusion attachment enables the processing characteristics of many materials. The tool is used for screw plastification - i.e. extruding and injection molding - the most common method of processing plastics, rubber, food stuffs and ceramic materials. The measuring extruder contains the necessary measuring, control and monitoring technology for the respective application.
Features
- Mobile measuring sensors
- Integrated heating and cooling circuits
- Peripheral units such as feeding and post-extrusion units
Application
- Extruding and injection of plastics, rubber, food stuffs and ceramic materials
- Measurement of viscosity during processing
- Pilot processes
Technical Specifications
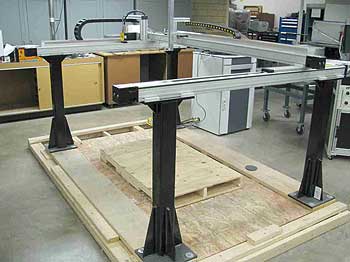
Using a General Electrics Krautkramer USN 58L, this gantry can classify sub-surface flaws in composite systems. This scanner can handle multiple non-destructive inspection applications, ranging from research and inspection procedure development activities, up to industrial inspections for corrosion mapping, inspection of fasteners, multi-layered structures, and more.
Features
- Range 0.040 to 480in. (1 to 12,192 mm) at steel velocity
- Material Velocity Continuously adjustable from .0394 to .6299 inches/μs
- Pulse Voltage: Square-wave excitation pulse 50 to 450 V adjustable in 10 V increments
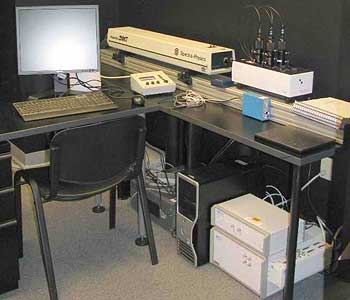
Laser Doppler Velocimetry is a non-contact method for classifying velocity with resolution up to 90,000 points per second. Typically used for fluids classification, this system provides a method for retrieving velocities during impact situations without the use of piezoelectric crystals. This gives our lab the ability to analyze the dissipation of energy during moderate velocity impacts beyond the capabilities of force transducers. Using a 5W Spectra Physics Argon Laser, a wide range of velocities can be analyzed with greater resolution.
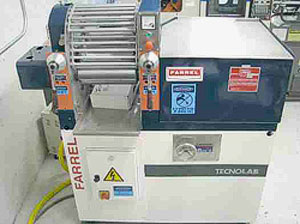
Configured for both rubber and plastic applications, the Farrel Two-Roll Mill is designed for multi-batch routine milling. The controls are designed and engineered to provide the flexibility required in R&D environments.
Features
- More accessible front roll
- 1.3 lb capacity
- 350°F max Temp
Technical Specifications
- Roll Diameter: 6 in (152 mm)
- Roll Width: 13 in (330 mm)
- Sheeting Capacity: 3 lb (1.4 kg)
- Front Roll Speed: 34 to 17 rpm
- Rear Roll Speed: 24 rpm, Fixed
- Friction Ratio Range: 0.71:1 to 1.41:1
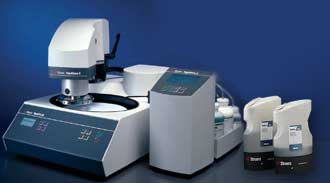
Proper sample preparation crucial when classifying any material. The TegraForce-5 is allows us to handle up to six specimens can be inserted in a specimen mover plate, where the force is applied individually to each specimen. Coupled with the Tegra Doser 5, automated polishing is made easy. A Struers Secotom 10 sample saw ensures consistent, high-quality sample sectioning.
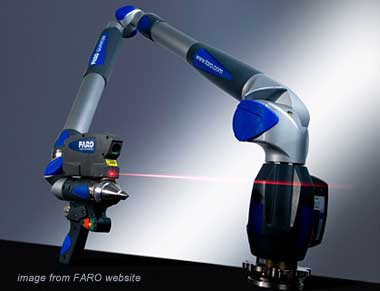
The FARO Laser ScanArm V3 is ideal for inspection, point cloud-to-CAD comparison, rapid prototyping, reverse engineering, and 3D modeling. The ability to hard-probe measure simple point variations, then laser scan sections for larger volumes of data allows the lab to save time when designing and classifying systems. This is done without the wasted time of adding/removing attachments, untangling cabling, or importing data from another CMM.
CAPE uses Geomagic Studio and Qualify for reverse engineering and inspection.
Features
- Accuracy: 35μm (.0014")
- Repeatability: ±35μm, 2σ (±.0014")
- Stand-off: 95mm (3.75")
- Depth of Field: 85mm (3.35")
- Effective Scan Width: Near field 34mm (1.34")
- Far field 60mm (2.36")
- Laser Line Probe V3 Specifications
- Points per Line: 640 points/line
- Scan Rate: 30 frames/second
Applications
- Reverse Engineering
- Certification
- Part Inspection
- Tool Building & Certification
- Alignment
- Part Inspection
- Mold and Die Inspection
- Prototype Part Scanning